
Chimney Flashing Leaking? 8 Signs to Catch It Early
| Factor | Older/historic masonry | Modern masonry |
|---|---|---|
| Mortar binder | Lime-based, low or no Portland cement | Portland-cement-based, harder curing |
| Mortar flexibility | Softer, some self-healing of hairline cracks | Rigid once cured, cracks stay cracked |
| Brick type | Handmade or soft-mud, lower fire temperature | Extruded, wire-cut, higher fire temperature |
| Brick porosity | More absorbent, prone to spalling | Denser, less water uptake |
| Typical liner status | Often unlined, undersized, or original clay tile | Liner sized and installed to current standards |
| Repair priority | Match mortar chemistry, not just color | Standard modern mortar mixes generally compatible |
| Common failure pattern | Brick face spalling; joint self-healing can mask real deterioration | Joint cracking tends to precede brick damage |
Older chimneys were often built on shallower footings than current standards call for, and after decades of ground movement and the chimney's own weight, some settling is common: a slight lean, a visible gap where the chimney meets the roofline, or a stair-step crack pattern following the mortar joints diagonally. A small, stable lean or an old, dormant crack isn't automatically an emergency, but telling "old and stable" from "active and worsening" benefits from a hands-on inspection rather than a guess from the ground.
A technician can often get a first read on mortar type without lab testing. Dragging a metal key or nail across a joint that leaves a visible scratch and a little powder points toward a softer, lime-rich mix, while a joint that resists scratching and holds a sharp edge points toward a harder, Portland-heavy mix. This test doesn't replace a proper inspection or lab analysis of the actual composition, but it's a useful first check before assuming a chimney can be treated like standard modern construction.
The damper is the movable plate that opens and closes the path between the firebox and the flue above it. Traditional dampers are a hinged metal flap mounted at the throat, right in front of the smoke shelf at essentially the same level; newer systems often use a top-mount damper instead, a sealing plate at the very top of the flue operated by a cable or lever from the firebox. The damper's job: it closes off the flue when there's no fire burning, so conditioned indoor air doesn't pour straight up the chimney, and it opens fully to let smoke and gases draft out when you do have a fire going. A damper that won't seat properly, whether warped, rusted, or coated in old creosote, wastes energy and can also affect how well a fireplace drafts once lit.
Hearth Extension
A stain on the ceiling near your fireplace, a strip of rusted metal along the roofline, a drip you only hear during a hard rain: any one of these can point to failing chimney flashing, and flashing failure is one of the most common reasons a chimney leaks. Because the flashing seal is layered metal tucked under shingles and against masonry, the damage is often invisible from the ground until water has already found its way inside. Here's what to look for, why it happens, and how a technician traces a flashing leak back to its actual source instead of guessing.
The Two-Piece System Behind Every Roof-Chimney Seal
Flashing isn't a single strip of metal; it's two separate pieces working together, and understanding how they interlock is the key to reading any of the signs below.
Step flashing is a series of small L-shaped metal pieces, one per shingle course, woven into the roof as it's installed. Each piece overlaps the one below it and tucks under the shingle above, so water running down the roof slope is shed onto the shingles rather than into the seam where the roof meets the brick. Step flashing isn't fastened rigidly to the masonry; it only contacts the roof deck and shingles, which lets it shift slightly with the roof without tearing.
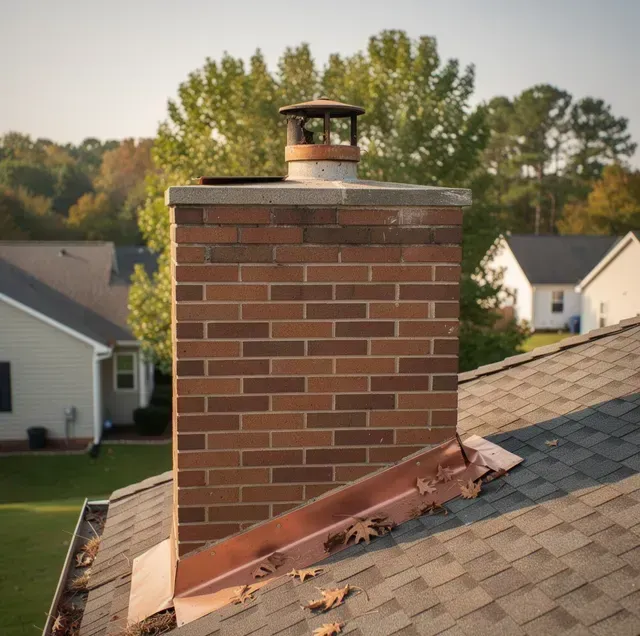
Counter-flashing is the second piece, set higher and cut into the masonry itself, either into a reglet (a groove chiseled roughly half an inch into a mortar joint) or tucked under the overhang of the chimney crown. It folds down and over the top edge of the step flashing, covering the seam without being fastened to it, so the two pieces can expand and contract independently. When both pieces are installed and overlapped correctly, water is always moving downhill over metal, never pooling at a joint or finding a gap to slip through.
Signs Flashing Is Leaking Inside the House
A flashing leak often shows up indoors before you ever see anything wrong on the roof. Watch for:
- A stain on the ceiling or upper wall that lines up with the chimney's footprint, not necessarily right next to the firebox itself
- A stain that darkens or spreads specifically during wind-driven rain, rather than every time it rains
- Peeling paint or a soft, spongy patch of drywall where the chimney passes through the attic or roofline
- A musty smell from the attic space around the chimney chase, especially a day or two after a storm
- Water spots on rafters or roof sheathing, visible if you look up into the attic near the chimney
The wind-driven detail matters. A flashing gap often only leaks when wind pushes rain sideways into the seam, so a stain that only appears during gusty storms and stays dry during a calm, straight rain is a strong clue pointing to flashing rather than a cracked chimney crown, which tends to leak in any rain regardless of wind.
Signs Flashing Is Leaking on the Roof
If you can safely view the roofline from a ladder, from the ground with binoculars, or from a phone photo taken on a pole, look for:
- Rust streaks running down the brick directly below the flashing line, distinct from staining lower on the stack
- A visible gap between the counter-flashing and the masonry, especially where old caulk has shrunk away from the joint
- Step flashing pieces that look bent, lifted, or pulled loose from under the shingle edge above them
- Caulk or roofing cement smeared over the seam that's cracked, chalky, or peeling; a bead of caulk was never meant to be the primary seal
- Nail heads or fastener holes with rust trailing below them, or fasteners that have backed out and sit proud of the metal
- Shingles near the chimney that look newer or different from the rest of the roof, which can mean a past repair disturbed the flashing without properly resetting it
None of this requires climbing onto the roof yourself. A technician doing a proper inspection checks each of these points directly, along with testing whether the counter-flashing is still gripping its mortar joint the way it should.
What Actually Makes Flashing Fail
Flashing is built to last for decades, but a handful of specific failure modes account for most of the leaks a technician ends up tracing.
Corrosion: Galvanized steel flashing relies on a zinc coating to resist rust, and once that coating wears through, pinholes and rust-through follow. Copper and aluminum resist corrosion better on their own, but copper flashing fastened with steel nails, or set touching a dissimilar metal, can suffer galvanic corrosion, where the two metals react and slowly eat away at the less noble one.
Caulk-only repairs: Smearing caulk or roofing cement over a flashing gap is a stopgap, not a repair. Even a masonry-rated sealant typically only holds for three to five years before sun exposure and roof movement break the bond, and it tends to fail unevenly, so part of the seam can still look sealed while water is already getting through somewhere else along the same joint.
Fasteners backing out: Counter-flashing set into a mortar reglet is typically held with masonry nails or screws driven into the joint. Years of thermal cycling and roof vibration can work those fasteners loose, and once one lets go, the flashing above it sags and opens a gap even while the rest of the piece still looks intact from a distance.
Thermal movement: Metal flashing expands and contracts with temperature swings, and it's engineered to move slightly as a result. Flashing that was over-fastened, caulked solid, or otherwise pinned rigid can't move the way it's designed to, so the metal eventually fatigues and cracks at the stress point instead of flexing.
Installation shortcuts: Not every flashing leak traces back to age. Step flashing run as one continuous strip instead of individual interleaved pieces, insufficient overlap between courses, or counter-flashing surface-mounted with caulk instead of properly let into a cut reglet will all leak sooner than a correctly built system, sometimes within the first few years. A re-roofing job is one common way existing flashing gets reused or reset poorly, but flashing built correctly from day one can also simply reach the end of its service life.
Why a Flashing Leak Is Easy to Misdiagnose
A stain near the chimney can come from at least three different sources, and none of them announce which one is guilty on sight. A cracked chimney crown leaks water down inside the flue in any rain, wind, or no wind. A roof leak unrelated to the chimney, from worn shingles elsewhere on the slope, can travel sideways along the sheathing before showing up on a ceiling nowhere near its actual entry point. A flashing leak, by contrast, usually shows a wind-direction pattern and stays confined near the roofline rather than the top of the stack. Freeze-thaw cycling flexes and opens small gaps at the flashing seams over a winter; the heavy rain and thunderstorm stretches later in the year are typically when those same gaps get discovered, since that's when enough wind-driven water hits the seam at once to show up indoors. Reading the timing correctly, which season opened the gap versus which storm revealed it, is part of how a real diagnosis gets made instead of a guess.
Tracing the actual source usually starts with a visual inspection from the roof and attic, checking the crown, cap, and mortar joints alongside the flashing rather than jumping straight to whichever one is easiest to see from the ground. When the source still isn't obvious, a controlled water test, running a hose over one section of the roof at a time while someone watches inside, can isolate exactly which layer is letting water through. This kind of sequential leak detection is the difference between a repair that actually stops the leak and one that just moves the stain to a different spot next season.
Frequently Asked Questions
Can caulking a flashing gap fix it for good?
Not usually. Even a masonry-rated exterior sealant typically holds up for only three to five years before ultraviolet exposure and thermal movement break the bond. A lasting fix re-cuts the mortar reglet slightly deeper than the failed one and sets the new counter-flashing lip into it with a lead wedge or fresh mortar pack to hold it tight, which is a different job entirely from smearing sealant over the existing gap.
How can I tell if a ceiling stain is from flashing and not a roof leak somewhere else?
Check where the stain sits relative to the chimney's footprint, not just the nearest ceiling. A flashing leak generally shows up close to where the chimney breaks the roofline, while a shingle leak elsewhere on the slope can travel along the underside of the sheathing and drip out a foot or more from its actual entry point. It's also worth ruling out other nearby roof penetrations: a plumbing vent boot, the rubber collar around a vent pipe, typically dries out and cracks after roughly a decade and can produce a nearly identical-looking stain.
Does the type of flashing metal affect how long it lasts?
Yes. Copper flashing can last 50 years or more and develops a protective greenish patina as it weathers. Aluminum is lighter and easier to form around tight details, but it's more prone to denting and can pit when it sits against wet, high-alkalinity mortar over time. Galvanized steel falls in between, generally holding up for two to three decades before its zinc coating wears through enough to let rust start.
Can flashing fail even if the roof around it still looks fine?
It can, because the failure sometimes starts on the masonry side rather than the metal. Repeated freeze-thaw cycling can erode the mortar packed into the reglet, loosening the counter-flashing's grip on the joint even though the metal itself isn't damaged or visibly rusted. A technician checks for this by gently testing whether the counter-flashing lip can be lifted with a putty knife; if it moves more than it should, the reglet has already let go even though nothing looks wrong from the ground.
Will a new chimney cap or crown repair also fix a flashing leak?
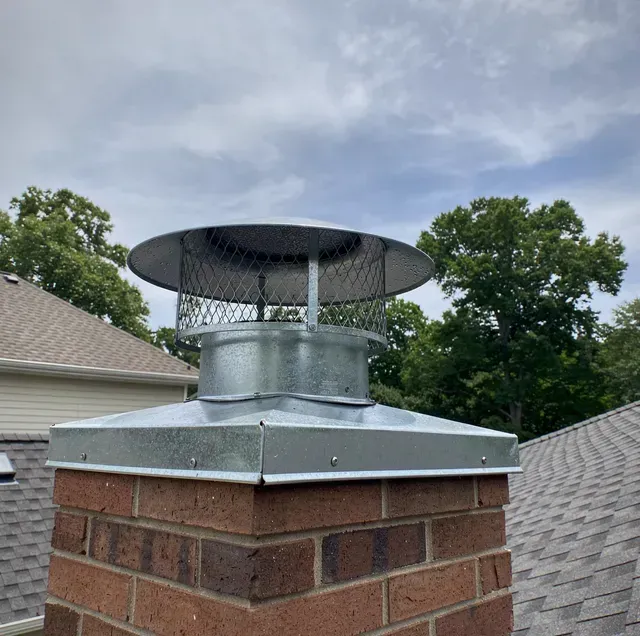
No, and it's not unusual for an older chimney to need both at once, since a cap, a crown, and a flashing system installed at the same time tend to age on a similar timeline. A cap keeps rain from pouring straight down the flue, and a crown sheds water off the top of the stack, but neither one touches the seam where the chimney meets the roofline. Flashing has to be inspected and repaired as its own item.
How often should flashing be checked?
Most flashing installations are rated for 20 to 30 years depending on the metal, but that number assumes fasteners, sealant touch-ups, and the mortar reglet get checked periodically rather than left alone the entire time. Folding a flashing check into an annual chimney inspection catches a lifted step piece or a loosening reglet months before it ever produces a stain indoors, which is a much smaller fix than waiting for the ceiling to show it.
One Gap Is All Water Needs
Most flashing leaks trace back to one failed seam or one lifted piece of step flashing, not a wholesale failure of the roof-to-chimney seal, which is why most repairs stay small when they're caught early. A rust streak on the brick below the roofline, a stain that only shows up when the wind blows a certain direction, a piece of counter-flashing that no longer sits tight against the mortar: any one of those is worth tracing now, before the next storm finds the same gap and turns a resealing job into work on the framing underneath.
Get your flashing checked and traced — a CSIA-certified technician can pinpoint whether it's the flashing, the crown, or the cap letting water in before it spreads further. Perfect Chimney Cleaning serves Greensboro, High Point, and Winston-Salem. Call (336) 604-6711.
Recent Posts