How to Build a Cleaner-Burning Fire and Cut Creosote
| Factor | Older/historic masonry | Modern masonry |
|---|---|---|
| Mortar binder | Lime-based, low or no Portland cement | Portland-cement-based, harder curing |
| Mortar flexibility | Softer, some self-healing of hairline cracks | Rigid once cured, cracks stay cracked |
| Brick type | Handmade or soft-mud, lower fire temperature | Extruded, wire-cut, higher fire temperature |
| Brick porosity | More absorbent, prone to spalling | Denser, less water uptake |
| Typical liner status | Often unlined, undersized, or original clay tile | Liner sized and installed to current standards |
| Repair priority | Match mortar chemistry, not just color | Standard modern mortar mixes generally compatible |
| Common failure pattern | Brick face spalling; joint self-healing can mask real deterioration | Joint cracking tends to precede brick damage |
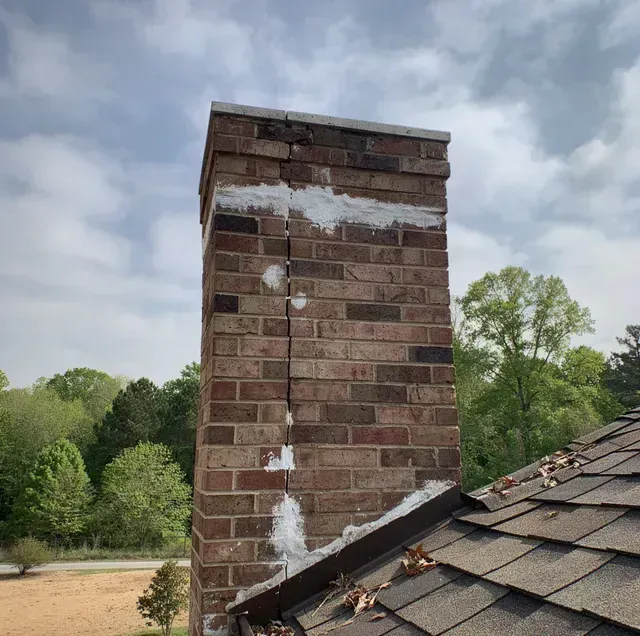
Older chimneys were often built on shallower footings than current standards call for, and after decades of ground movement and the chimney's own weight, some settling is common: a slight lean, a visible gap where the chimney meets the roofline, or a stair-step crack pattern following the mortar joints diagonally. A small, stable lean or an old, dormant crack isn't automatically an emergency, but telling "old and stable" from "active and worsening" benefits from a hands-on inspection rather than a guess from the ground.
A technician can often get a first read on mortar type without lab testing. Dragging a metal key or nail across a joint that leaves a visible scratch and a little powder points toward a softer, lime-rich mix, while a joint that resists scratching and holds a sharp edge points toward a harder, Portland-heavy mix. This test doesn't replace a proper inspection or lab analysis of the actual composition, but it's a useful first check before assuming a chimney can be treated like standard modern construction.
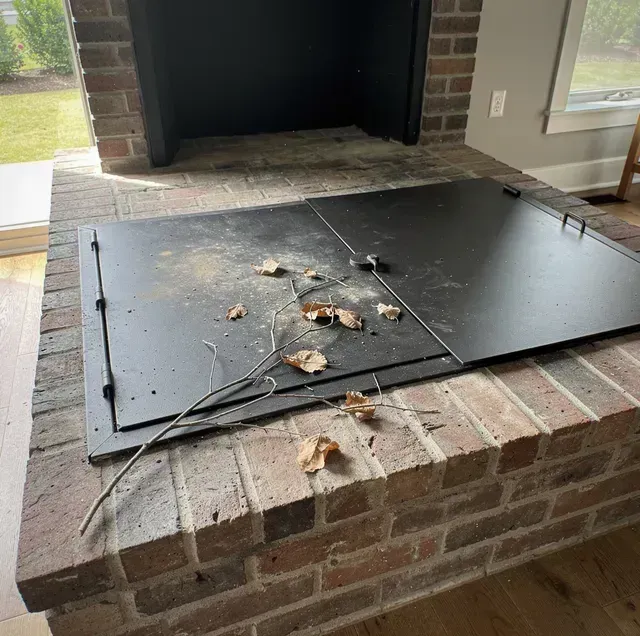
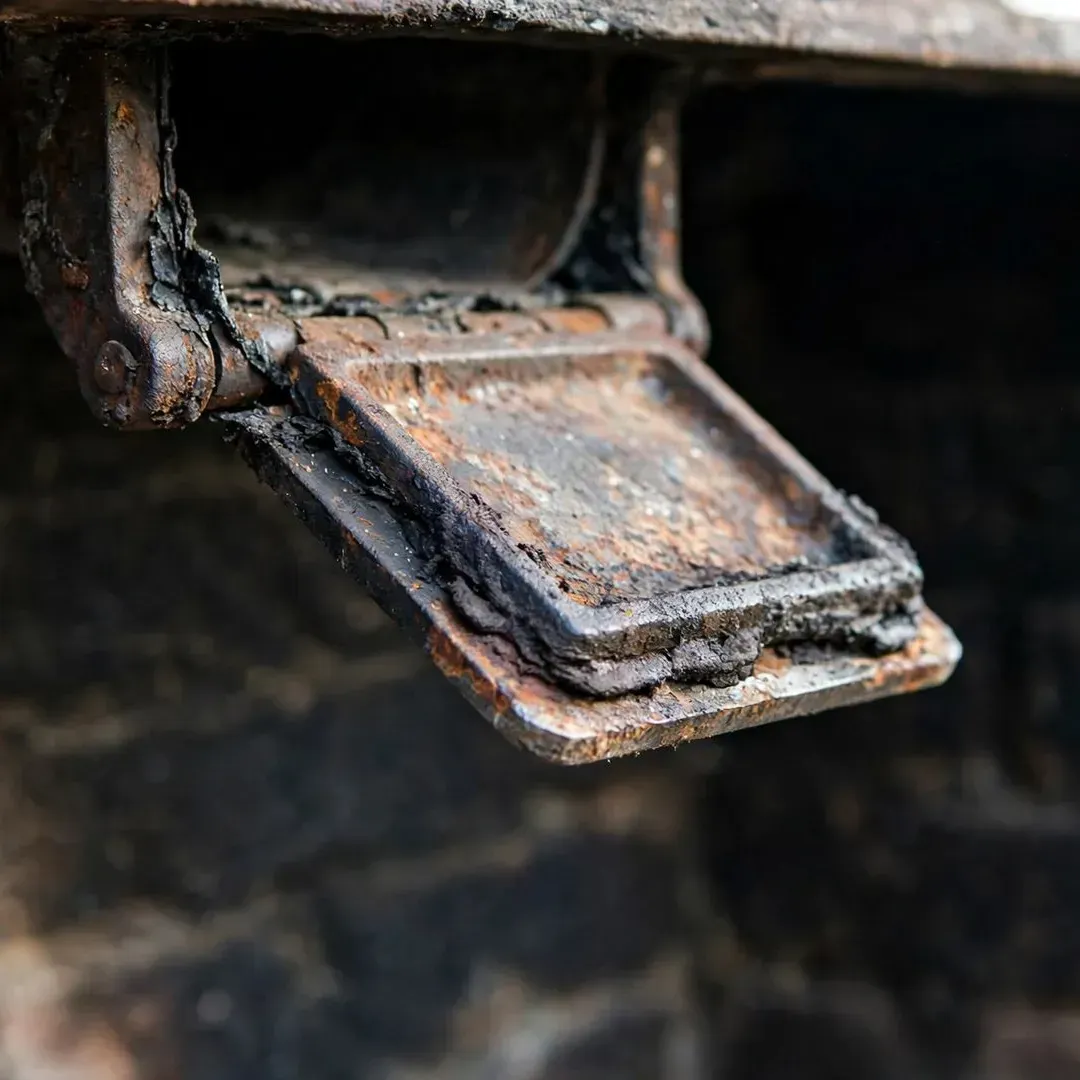
The damper is the movable plate that opens and closes the path between the firebox and the flue above it. Traditional dampers are a hinged metal flap mounted at the throat, right in front of the smoke shelf at essentially the same level; newer systems often use a top-mount damper instead, a sealing plate at the very top of the flue operated by a cable or lever from the firebox. The damper's job: it closes off the flue when there's no fire burning, so conditioned indoor air doesn't pour straight up the chimney, and it opens fully to let smoke and gases draft out when you do have a fire going. A damper that won't seat properly, whether warped, rusted, or coated in old creosote, wastes energy and can also affect how well a fireplace drafts once lit.
Hearth Extension
When a Post-Renovation Inspection Is (and Isn't) Warranted
The hearth extension, the noncombustible floor pad in front of the firebox opening, catches stray ash, bark, splinters, and the occasional ember that pops clear of the fire. A quick vacuum with a shop vac or a canister vacuum's brush attachment once a week during active burning keeps this debris from working into carpet fibers or wood flooring at the hearth's edge, and it's your chance to glance for embers that landed outside the firebox and cooled without your noticing. Check that logs, kindling, and any decorative items on the mantel or nearby furniture haven't crept closer to the opening than the several feet of clearance most fireplace manufacturers and fire-safety groups recommend as a baseline. This is also a good moment to make sure nothing- a rug corner, a stack of kindling, a pet bed- has migrated into that clearance zone since the last time you checked.
Waterproofing is a preventive and protective treatment for masonry that's fundamentally in good shape but exposed to the elements, not a repair for masonry that's already showing damage. If the brick or mortar has visible deterioration such as spalling, crumbling joints, or a cracked crown, that damage needs to be addressed on its own terms before waterproofing goes on top of it, since sealing over a compromised surface just locks moisture problems in rather than out. Once repairs are handled, waterproofing is a reasonable next step for extending the life of the masonry and reducing how much water it absorbs going forward, particularly on a chimney with no roof overhang or nearby shelter shielding it from direct weather. It's also a sensible addition anytime a chimney gets rebuilt or has significant tuckpointing done, since new mortar is at its most porous in the first year or two.
Reading Your Results
| Red Flag | What a Legitimate Technician Does Instead |
|---|---|
| Rock-bottom advertised price, then "mandatory" add-ons once the tech is on-site | States the base price and what could change it before the appointment; add-ons are optional and explained, not sprung |
| Claims of imminent fire or CO danger with no proof | Shows photos or video tied to the specific finding, or explains it in plain language you can follow |
| Vague or evasive about certification and training | Names the certifying body (e.g., CSIA), can describe what the credential covers |
| No mention of insurance, no findable business address | Carries liability coverage and can provide proof if asked; operates from a verifiable business |
| Refuses to show camera footage or "you wouldn't understand it" | Walks you through findings, translating technical detail into plain terms |
| "This price is only good if you sign today" | Gives you time to think it over; urgency is reserved for genuine active hazards, not routine repairs |
| Unmarked vehicle, cash-only, no paperwork | Provides a written estimate or service report you can keep |
Checking a company's standing takes a few minutes and heads off most of the above. Look up online reviews for specific complaints, not just the star rating. Confirm the business has a physical address you can find, not just a phone number. Ask about certification and insurance before scheduling, not after a technician is in your driveway. If your state or municipality licenses chimney sweeps, that license number should be something the company provides without hesitation, and a short phone call asking directly usually tells you a lot from how readily it gets answered.
Set the red flags aside for a moment, because it helps to know what you're aiming for, not just what you're avoiding. A technician doing this job the right way walks you through the visit almost like a translator: here's what I found, here's what it means, here's what happens if it's left alone versus addressed. If a camera scan turns something up, you see the footage, or at minimum get a clear description tied to a specific location in the flue, not a vague reference to "damage up there." Recommendations get written down, often in a service report you keep, so you have a record to compare against next year rather than a verbal claim you have to just remember and trust.
Pricing is explained before work starts, and changes to that price come with a reason you can follow, not a mandatory bundle sprung mid-visit. And critically, nothing about the timeline pressures you into deciding on the spot. A technician confident in the finding doesn't need you to decide before he's back in the truck.
| Symptom | Likely Cause | What to Do |
|---|---|---|
| White, chalky staining on the brick | Efflorescence: water moving through porous masonry and leaving mineral deposits behind as it evaporates | Leak detection to find the entry point, then a breathable waterproofing treatment |
| Rust stains or flaking metal around the damper or firebox | Water reaching the damper assembly, firebox, or metal chimney components | Damper inspection and repair, plus a check of the cap and crown for openings |
| Crumbling, flaking, or pitted brick faces (spalling) | Repeated saturation, worsened by freeze-thaw cycling, pushing the brick's face apart from the inside | Masonry repair, or a partial to full rebuild in advanced cases |
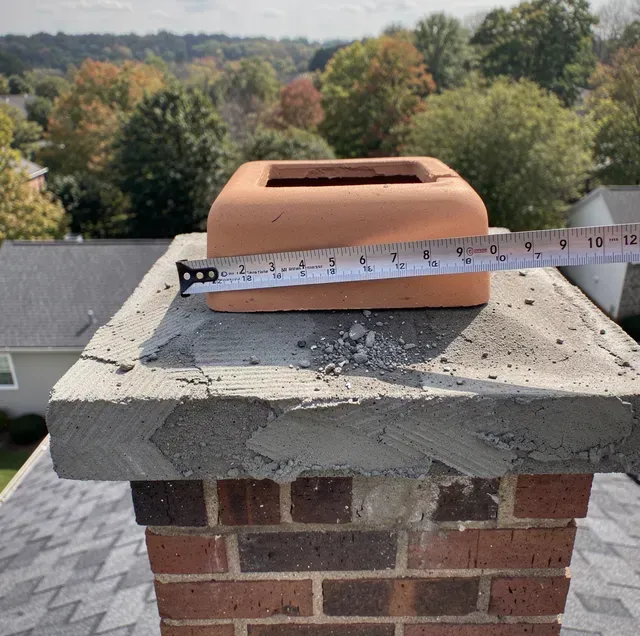
| Cracks or erosion in the chimney crown | The concrete or mortar wash at the top of the stack has failed, letting rain track straight into the flue | Crown repair or replacement, paired with a properly fitted cap |
| Water stains on the ceiling or wall near the fireplace | Flashing where the chimney meets the roofline has separated, corroded, or was installed poorly | Leak detection to confirm the source, then flashing repair |
| A musty, damp smell from the fireplace, especially after rain | Trapped moisture in the flue liner, firebox, or smoke chamber that never fully dries out | A Level 2 inspection of the interior, plus waterproofing if the masonry is porous |
What Comes After the Inspection
Creosote is not a mystery deposit that shows up on its own. It is unburned fuel. When a fire runs cool and smoky, the wood gives off gases and fine particles that never fully combust, and those leftovers ride the smoke up the flue, cool against the cold masonry or liner, and condense into a sticky, tarry film. Do that fire after fire, and the film thickens into the crusty, flaky, or glazed layer a sweep scrapes out. The layer matters because creosote is highly flammable, and a heavy buildup is exactly what feeds a chimney fire.
The useful part of that story is what it tells you about prevention. Smoke is the signal. A visibly smoky fire is depositing creosote right then; a fire burning hot and clean, with only a shimmer of heat above the flue and little visible smoke, is depositing very little. So the whole job of a cleaner burn comes down to one goal: keep combustion complete. That means dry wood, plenty of air, and enough heat to burn the smoke instead of sending it up the chimney unburned.
QUICK ANSWER: A cleaner-burning fire comes from three things working together: seasoned wood under about 20 percent moisture, a fully open damper so the fire gets enough air, and a hot, fast-lighting build such as the top-down method. Hot and well-aired means complete combustion, which means less smoke and far less creosote.
Why Smoke Equals Creosote
Wood does not burn all at once. First, the heat drives off moisture; then it releases combustible gases and vapors; and only at higher temperatures do those gases actually ignite and burn. A fire that stays cool never reaches the point where those gases combust in the firebox. They leave as smoke instead, still carrying most of their energy, and that is the raw material creosote is made from.
Picture the difference between a candle burning clean and a candle you have just blown out. The clean flame leaves almost nothing behind; the smoldering wick throws off a ribbon of gray smoke you can smell across the room. A wood fire behaves the same way at a larger scale. Keep it in the clean-flame state, and the byproducts get consumed inside the firebox. Let it smolder, and those byproducts head up the flue to condense.
Two conditions push a fire toward the smoldering state more than anything else: wet wood and too little air. Fix both, and you have solved most of the creosote problem before you strike a match.
Start With Dry, Seasoned Wood
Freshly cut wood can be half water by weight. Every bit of that moisture has to boil off before the wood will burn hot, and boiling it off steals heat the fire needs to reach clean-combustion temperature. The result is a cool, hissing, smoky fire, which is a creosote factory.
Seasoned wood is wood that has been split and stacked long enough to dry to roughly 20 percent moisture or lower. A moisture meter, pressed to a freshly split face, is the reliable way to check. Without one, look for the tells: checking cracks radiating from the end grain, a hollow knock when two pieces are struck together, bark that loosens easily, and a grayed rather than fresh-cut color.
How to Season It Right
- Split before you stack: Splitting exposes the wet interior and speeds drying dramatically over leaving rounds whole.
- Stack off the ground with air gaps: Pallets or rails underneath and loose stacking let air move through the pile.
- Cover the top, leave the sides open: A tarp over the top sheds rain; wrapping the whole stack traps moisture and defeats the purpose.
- Give hardwoods time: Dense species like oak often need a year or more; less dense hardwoods dry faster.
Burning fully dry wood is the single biggest lever most people have over creosote, because it fixes the fire's temperature at the source.
Build the Fire for a Hot, Clean Start
The old habit of crumpling paper on the bottom, piling kindling on top, and stacking logs over that lights fast but burns dirty at first. The flames climb through the pile, and the upper logs smolder in the smoke below them until the whole load finally catches. Those first smoky minutes deposit creosote.
The top-down method flips the stack and burns cleaner from the first minute. Lay your largest splits flat on the firebox floor, packed fairly tight. Add a layer of smaller splits crosswise on top, then a layer of thin kindling, and finally the tinder at the very top. You light the top. The fire burns downward, and the flames and smoke from above pass down through wood that is already heating up, so more of the smoke gets ignited on the way. It also needs less tending, since you are not opening the door to rebuild a collapsing pile.
Either way you build it, the aim is the same: reach a bright, active flame quickly and hold it there, rather than nursing a low smolder.
Give the Fire Enough Air
Air is fuel for combustion just as much as the wood is. Choke the air supply, and you drop the fire's temperature, which is the same thing as inviting creosote.
Open the damper fully before you light, and keep it open. A common and costly mistake is damping the fire down hard to make a load last through the night. That low, starved, smoldering burn feels efficient, but it runs cool and smoky, and lays down creosote fast.
If your appliance has an air control, resist the urge to run it at the lowest setting for hours on end. A slightly shorter, hotter, cleaner burn is better for the flue than a long, cool, dirty one.
Warm a Cold Flue Before You Load It
A chimney works because hot air rises, pulling smoke up and out. That upward pull is the draft. When the flue is cold, especially in a chimney that runs up an exterior wall, the column of cold air inside can resist the draft and even push smoke back into the room. A cold, weak draft also means a cooler, smokier fire.
The fix is to prime the flue. Before lighting the main load, hold a lit, rolled-up piece of newspaper or a long fire starter up near the open damper for a minute or two. That warms the air at the top of the firebox, gets the column moving upward, and establishes draft so the fire lights briskly and pulls its smoke where it belongs. It is a small step that makes the difference between a fire that roars to life and one that sulks and smokes.
Burn the Right Fuel, and Only the Right Fuel
What you put in the firebox matters as much as how you build it.
Skip These
- Softwoods as a steady diet: Pine, fir, and spruce are resinous and, when not fully seasoned, tend to burn smokier and deposit more. Well-seasoned softwood is fine for kindling and quick heat, but it is not the base of a clean-burning load.
- Treated, painted, or manufactured wood: Pressure-treated lumber, plywood, particleboard, pallets of unknown origin, and anything painted or stained can release toxic fumes and burn dirty. Keep them out entirely.
- Trash, cardboard, and wrapping paper: Glossy paper and packaging throw off fine ash and chemicals, foul the flue, and send burning scraps up the chimney.
Clean-burning fuel is simple: well-seasoned hardwood, plus a little dry softwood or plain newspaper and natural kindling to get it going.
Load the Firebox Right-Sized
More wood is not more heat if the fire cannot get air around it. Cramming the firebox packs the load so tightly that flames cannot reach every face, and the buried pieces smolder. A right-sized load, a few pieces with space for air to move between and around them, burns hotter and more completely than an overstuffed box.
Reload in modest batches as the fire burns down to a bed of coals, rather than dumping a large pile all at once. Adding wood onto a hot coal bed relights fast and cleanly; smothering the coals under a heavy load cools everything and smokes.
A Clean Burn Reduces Creosote, But Does Not Replace Sweeping
Everything above meaningfully cuts how fast creosote accumulates. A hot, dry, well-aired fire can deposit a small fraction of what a cool, wet, smoky one lays down over the same season. That is real protection, and it is worth the habit.
It is not a substitute for maintenance, though. Even the cleanest burner deposits some creosote over time, and only a physical inspection tells you how much is up there and whether the liner, cap, and masonry are sound. An annual sweep and inspection catches buildup before it becomes fuel for a chimney fire, and it flags problems you cannot see from the hearth. Pair good fire habits with regular professional service, keep a working smoke alarm and carbon monoxide alarm nearby, and never leave a fire burning unattended.
Frequently Asked Questions
How can I tell my fire is burning cleanly without special tools?
Look at the smoke leaving the top of the chimney. A cleanly burning fire, once established, gives off almost no visible smoke, just heat shimmer and a faint haze. Thick gray or blue smoke means incomplete combustion and active creosote deposit. Inside, bright, lively flames and a firebox with little dark soot buildup on the glass point to a clean burn; a smoky, lazy fire and glass that blackens quickly point to a cool, dirty one.
Does burning a fire once in a while clear out creosote already in the flue?
No, and trying it is dangerous. A very hot fire will not safely burn off an existing creosote layer; instead, it can ignite that layer and start a chimney fire. Glazed, third-degree creosote in particular is a hardened tar that a fire can set alight. Existing buildup has to be removed mechanically by a sweep, not burned out. Hot, clean fires prevent new buildup; they do not fix old buildup.
Are manufactured fire logs better or worse for creosote?
The wax-and-sawdust type sold for open fireplaces generally produces less creosote than a poorly built cordwood fire, because it burns at a controlled rate with fewer emissions. They are not a maintenance shortcut, though, and they are formulated for open fireplaces rather than for stoves or inserts, so check the packaging for where the log is rated to be used. They also do not replace the inspection that finds cap, liner, and masonry problems.
What moisture level should firewood be, and how long does seasoning take?
Aim for roughly 20 percent moisture or below, measured on a freshly split face with a moisture meter. Timing depends on species and conditions: dense hardwoods such as oak commonly need a year or more of proper stacking, while lighter woods like ash or birch can be ready in six months to a year. Wood split and stacked in spring is far likelier to be ready by the following heating season than wood cut and burned the same month.
Why does my fireplace puff smoke into the room when I light it?
That is usually a cold flue and a stalled draft. Cold air sitting in the chimney is heavier than the warm air trying to rise, so smoke takes the path of least resistance into the room until the flue warms and reverses. Priming the flue with a lit newspaper or fire-starter held near the damper before lighting the load usually fixes it. Persistent backpuffing after priming can signal a blockage, an undersized or oversized flue, or negative pressure in a tight house, which is worth having inspected.
Does a wood stove or insert make less creosote than an open fireplace?
A modern, well-run stove or insert can burn more completely than an open fireplace because it controls combustion air and holds more heat in the firebox, so cleaner combustion is achievable. The catch is that stoves are often run damped down low for long, slow burns, and running one starved for air produces heavy creosote quickly. The appliance helps only if you feed it dry wood and give it enough air; the same fuel-and-airflow rules decide the outcome.
Book your annual sweep and inspection before the buildup becomes a hazard — clean fire habits plus a professional check keep your chimney safe. Perfect Chimney Cleaning serves Greensboro, High Point, and Winston-Salem. Call (336) 604-6711.
Recent Posts