Older Brick Chimneys: The Repair That Cracks Them Worse
| Factor | Older/historic masonry | Modern masonry |
|---|---|---|
| Mortar binder | Lime-based, low or no Portland cement | Portland-cement-based, harder curing |
| Mortar flexibility | Softer, some self-healing of hairline cracks | Rigid once cured, cracks stay cracked |
| Brick type | Handmade or soft-mud, lower fire temperature | Extruded, wire-cut, higher fire temperature |
| Brick porosity | More absorbent, prone to spalling | Denser, less water uptake |
| Typical liner status | Often unlined, undersized, or original clay tile | Liner sized and installed to current standards |
| Repair priority | Match mortar chemistry, not just color | Standard modern mortar mixes generally compatible |
| Common failure pattern | Brick face spalling; joint self-healing can mask real deterioration | Joint cracking tends to precede brick damage |
Older chimneys were often built on shallower footings than current standards call for, and after decades of ground movement and the chimney's own weight, some settling is common: a slight lean, a visible gap where the chimney meets the roofline, or a stair-step crack pattern following the mortar joints diagonally. A small, stable lean or an old, dormant crack isn't automatically an emergency, but telling "old and stable" from "active and worsening" benefits from a hands-on inspection rather than a guess from the ground.
A technician can often get a first read on mortar type without lab testing. Dragging a metal key or nail across a joint that leaves a visible scratch and a little powder points toward a softer, lime-rich mix, while a joint that resists scratching and holds a sharp edge points toward a harder, Portland-heavy mix. This test doesn't replace a proper inspection or lab analysis of the actual composition, but it's a useful first check before assuming a chimney can be treated like standard modern construction.
The damper is the movable plate that opens and closes the path between the firebox and the flue above it. Traditional dampers are a hinged metal flap mounted at the throat, right in front of the smoke shelf at essentially the same level; newer systems often use a top-mount damper instead, a sealing plate at the very top of the flue operated by a cable or lever from the firebox. The damper's job: it closes off the flue when there's no fire burning, so conditioned indoor air doesn't pour straight up the chimney, and it opens fully to let smoke and gases draft out when you do have a fire going. A damper that won't seat properly, whether warped, rusted, or coated in old creosote, wastes energy and can also affect how well a fireplace drafts once lit.
Hearth Extension
When a Post-Renovation Inspection Is (and Isn't) Warranted
The hearth extension, the noncombustible floor pad in front of the firebox opening, catches stray ash, bark, splinters, and the occasional ember that pops clear of the fire. A quick vacuum with a shop vac or a canister vacuum's brush attachment once a week during active burning keeps this debris from working into carpet fibers or wood flooring at the hearth's edge, and it's your chance to glance for embers that landed outside the firebox and cooled without your noticing. Check that logs, kindling, and any decorative items on the mantel or nearby furniture haven't crept closer to the opening than the several feet of clearance most fireplace manufacturers and fire-safety groups recommend as a baseline. This is also a good moment to make sure nothing- a rug corner, a stack of kindling, a pet bed- has migrated into that clearance zone since the last time you checked.
Waterproofing is a preventive and protective treatment for masonry that's fundamentally in good shape but exposed to the elements, not a repair for masonry that's already showing damage. If the brick or mortar has visible deterioration such as spalling, crumbling joints, or a cracked crown, that damage needs to be addressed on its own terms before waterproofing goes on top of it, since sealing over a compromised surface just locks moisture problems in rather than out. Once repairs are handled, waterproofing is a reasonable next step for extending the life of the masonry and reducing how much water it absorbs going forward, particularly on a chimney with no roof overhang or nearby shelter shielding it from direct weather. It's also a sensible addition anytime a chimney gets rebuilt or has significant tuckpointing done, since new mortar is at its most porous in the first year or two.
Reading Your Results
| Red Flag | What a Legitimate Technician Does Instead |
|---|---|
| Rock-bottom advertised price, then "mandatory" add-ons once the tech is on-site | States the base price and what could change it before the appointment; add-ons are optional and explained, not sprung |
| Claims of imminent fire or CO danger with no proof | Shows photos or video tied to the specific finding, or explains it in plain language you can follow |
| Vague or evasive about certification and training | Names the certifying body (e.g., CSIA), can describe what the credential covers |
| No mention of insurance, no findable business address | Carries liability coverage and can provide proof if asked; operates from a verifiable business |
| Refuses to show camera footage or "you wouldn't understand it" | Walks you through findings, translating technical detail into plain terms |
| "This price is only good if you sign today" | Gives you time to think it over; urgency is reserved for genuine active hazards, not routine repairs |
| Unmarked vehicle, cash-only, no paperwork | Provides a written estimate or service report you can keep |
Checking a company's standing takes a few minutes and heads off most of the above. Look up online reviews for specific complaints, not just the star rating. Confirm the business has a physical address you can find, not just a phone number. Ask about certification and insurance before scheduling, not after a technician is in your driveway. If your state or municipality licenses chimney sweeps, that license number should be something the company provides without hesitation, and a short phone call asking directly usually tells you a lot from how readily it gets answered.
Set the red flags aside for a moment, because it helps to know what you're aiming for, not just what you're avoiding. A technician doing this job the right way walks you through the visit almost like a translator: here's what I found, here's what it means, here's what happens if it's left alone versus addressed. If a camera scan turns something up, you see the footage, or at minimum get a clear description tied to a specific location in the flue, not a vague reference to "damage up there." Recommendations get written down, often in a service report you keep, so you have a record to compare against next year rather than a verbal claim you have to just remember and trust.
Pricing is explained before work starts, and changes to that price come with a reason you can follow, not a mandatory bundle sprung mid-visit. And critically, nothing about the timeline pressures you into deciding on the spot. A technician confident in the finding doesn't need you to decide before he's back in the truck.
| Symptom | Likely Cause | What to Do |
|---|---|---|
| White, chalky staining on the brick | Efflorescence: water moving through porous masonry and leaving mineral deposits behind as it evaporates | Leak detection to find the entry point, then a breathable waterproofing treatment |
| Rust stains or flaking metal around the damper or firebox | Water reaching the damper assembly, firebox, or metal chimney components | Damper inspection and repair, plus a check of the cap and crown for openings |
| Crumbling, flaking, or pitted brick faces (spalling) | Repeated saturation, worsened by freeze-thaw cycling, pushing the brick's face apart from the inside | Masonry repair, or a partial to full rebuild in advanced cases |
| Cracks or erosion in the chimney crown | The concrete or mortar wash at the top of the stack has failed, letting rain track straight into the flue | Crown repair or replacement, paired with a properly fitted cap |
| Water stains on the ceiling or wall near the fireplace | Flashing where the chimney meets the roofline has separated, corroded, or was installed poorly | Leak detection to confirm the source, then flashing repair |
| A musty, damp smell from the fireplace, especially after rain | Trapped moisture in the flue liner, firebox, or smoke chamber that never fully dries out | A Level 2 inspection of the interior, plus waterproofing if the masonry is porous |
What Comes After the Inspection
Ask a mason what they check first on an old chimney, and many will tap a mortar joint with the butt end of a screwdriver before touching anything else. A ring like a knuckle on a countertop means hard, modern, Portland-cement-based mortar, probably a patch job from decades after the chimney went up. A duller, chalkier sound with a little crumbled material means original lime mortar, and that changes how the rest of the job should go. Most homeowners never think of mortar as two different materials with two different personalities. They just see "the gray stuff between the bricks." But on a chimney built before roughly the 1930s or 1940s, using the wrong version of that gray stuff is one of the most common ways a well-intentioned repair does more damage than the freeze-thaw cycle it was meant to prevent.
This matters apart from any single product decision. It affects how a chimney should be repointed, how a liner gets evaluated, how brick wears over time, and how a chimney tends to lean or shift as decades pass. Older masonry isn't just "the same chimney, but older." It's often a different building system entirely, and treating it like a newer one is where trouble starts.
The Mortar That Built It Isn't the Mortar Fixing It
Chimneys built with older methods typically used a mortar mix dominated by lime, sometimes with little or no Portland cement, closer to what masons now classify as Type O or a soft Type N mix. Portland cement, the ingredient that makes modern mortar so hard and fast-curing, wasn't in widespread residential use until well into the 20th century; before that, lime putty and sand were the standard binder, often mixed and slaked on site rather than bagged and shipped.
Lime mortar behaves almost like a shock absorber next to a modern cement-rich mix. It's softer, more porous, and has a small but real capacity to flex under stress rather than shatter. It also has a property that surprises most people: it can partially self-heal. Rainwater dissolves a tiny amount of free lime at the surface of a hairline crack, and as that moisture evaporates, the lime recrystallizes and knits some of the gap back together, part of why some 90-year-old joints with visible hairline cracking have held up fine for decades without falling apart.
Modern Portland-cement mortar doesn't do any of that. It cures harder, sheds water more aggressively at the surface, and once it cracks, it stays cracked. Neither mortar is better in the abstract. They're built for different jobs, and the mismatch is the actual problem.
Why a Stronger Patch Can Crack the Brick Instead of the Joint
Mortar joints are supposed to be the softest, most sacrificial part of a masonry wall by design: mortar is meant to wear out and get replaced long before the brick does, since repointing a joint is routine maintenance and replacing a cracked brick unit is not.
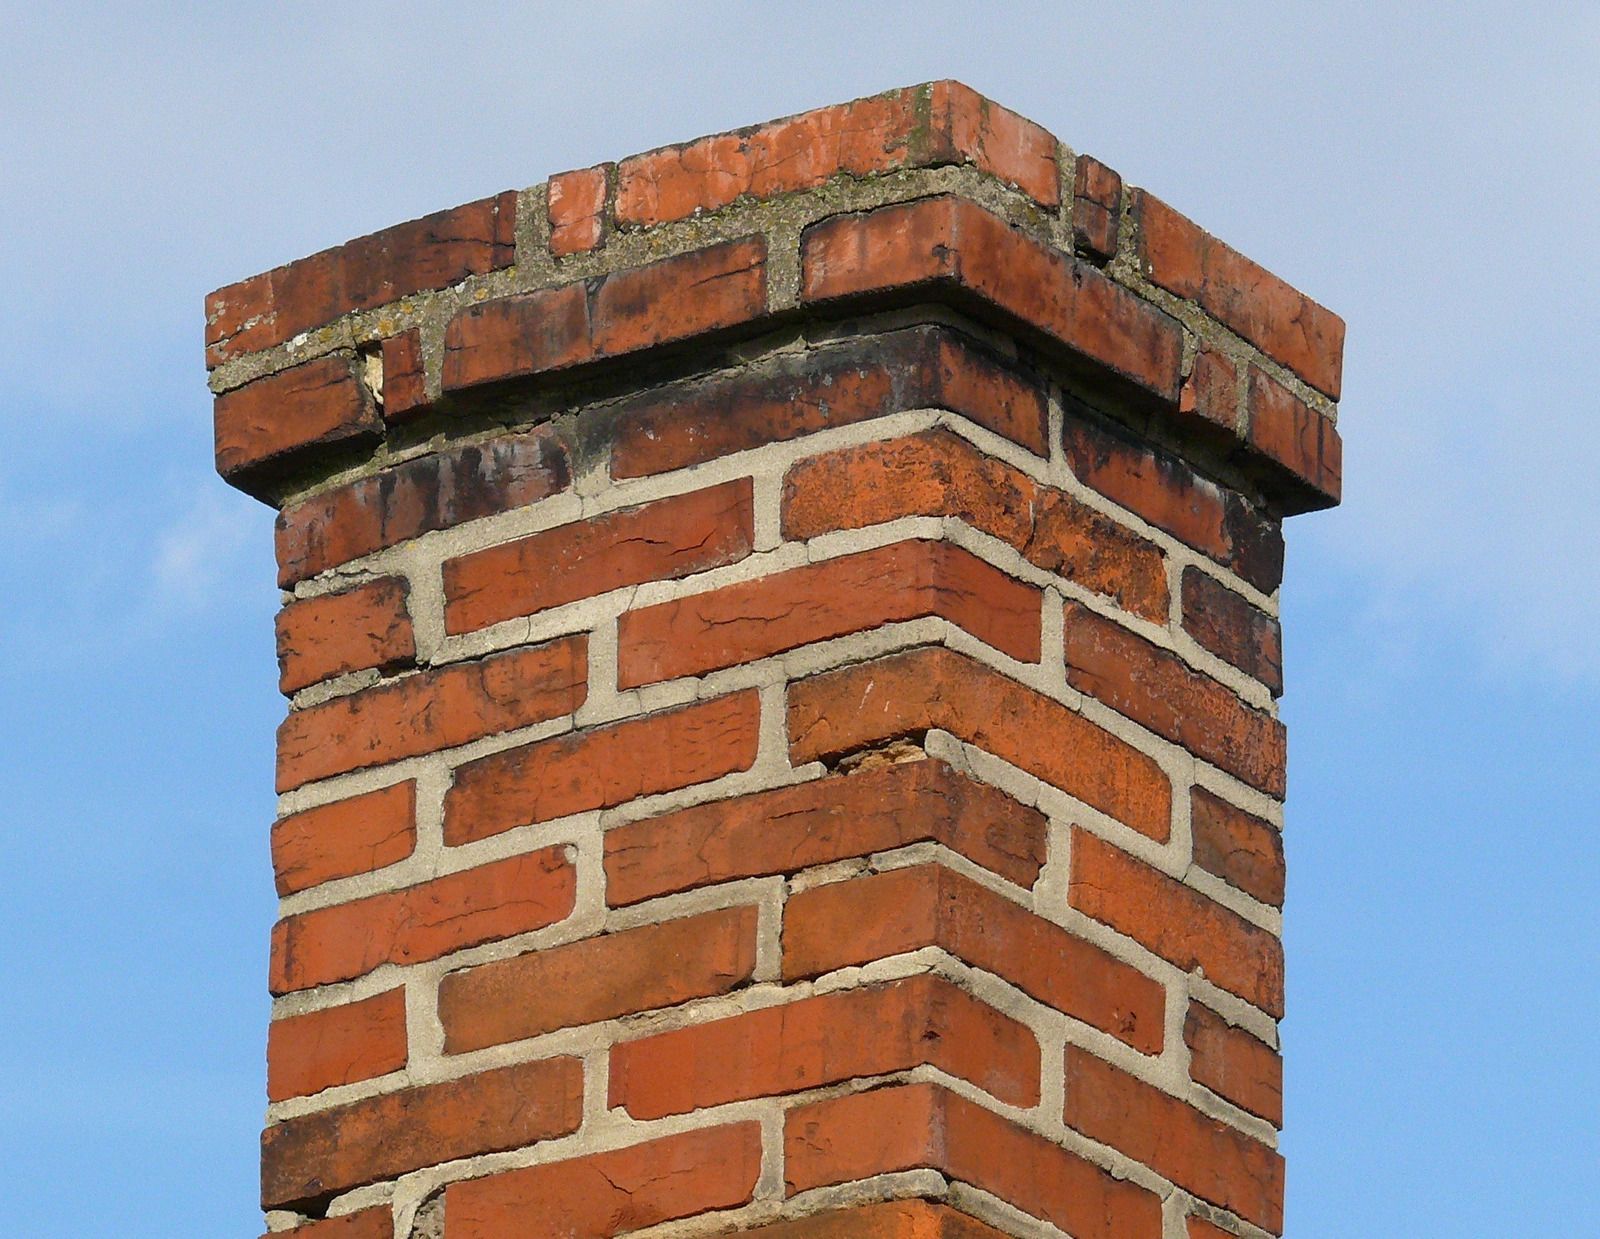
When someone repoints an old, lime-mortar chimney with a modern, Portland-cement-heavy mix, that hierarchy flips. The new mortar becomes harder and less flexible than the surrounding handmade brick, which was fired at lower kiln temperatures than today's extruded brick and is inherently softer and more absorbent. Water gets into the wall eventually, through capillary action or a small gap at the crown or flashing, and during a freeze cycle that trapped moisture expands. In a wall with correctly matched, softer mortar, the joint gives and takes the stress. In a wall where the joint has been hardened past the brick's own strength, the brick has nowhere to send that pressure except through itself, so it spalls, cracks, or shears at the face instead. The repair meant to protect the chimney ends up sacrificing the part that's hardest to replace.
This is also why patched sections on older chimneys often look worse over time than the untouched original brickwork right next to them, even though the patch is newer.
Repointing an Older Chimney the Right Way
Repointing means removing deteriorated mortar to a consistent depth, typically two to two and a half times the joint width, then packing new mortar in thin layers, letting each layer take an initial set before the next goes in. On a chimney with lime-based original mortar, the replacement mix needs to be compatible in hardness, permeability, and flexibility, not just in color.
In practice, this usually means a lime-based mortar or a lime-Portland hybrid formulated softer and more vapor-permeable than a standard modern mix, sometimes specified using historic lime-to-sand ratios rather than a bagged product name. A technician evaluating an older chimney should test the existing mortar's composition and hardness before specifying a repointing mix, not default to whatever's on the truck. Matching color and matching chemistry are two separate jobs, and only one of them protects the brick.
Repointing isn't all-or-nothing, either. A chimney can have sound mortar in most joints and deteriorated mortar concentrated near the crown or shoulders, and a competent repoint targets those areas rather than stripping the whole stack.
The Liner Problem Hiding Inside Many Older Chimneys
Mortar gets the attention because it's visible from the ground, but the liner question is arguably the bigger safety issue on older masonry. Chimneys built before modern liner practice became standard were sometimes constructed with no liner at all, relying on the brick and mortar joints to contain combustion byproducts, or with a liner undersized for whatever appliance eventually got connected as heating systems changed over the decades.
An unlined or undersized flue lets flue gases and creosote condense directly against masonry never engineered for that exposure, and it complicates drafting since the flue's dimensions may not match what the appliance needs. A Level 2 inspection, typically done with a video scan when a chimney changes hands or gets a new appliance, is the practical way to see what's actually inside an older flue, since interior condition often doesn't match the exterior brick. Relining options include a stainless steel liner sized to the current appliance, a clay tile liner where flue geometry allows it, or a cast-in-place liner forming a smooth, insulated channel inside a damaged original flue, often the practical answer once a shaft has settled out of true.
Softer Brick Wears Differently
Handmade or soft-mud brick, common in older construction, was fired at lower temperatures than the hard, extruded, wire-cut brick used today, which makes it more porous, so it absorbs more water and holds it longer. When that moisture freezes, the classic failure mode is spalling: the face of the brick pops off in flakes or chunks, leaving a rougher, pitted surface where the smooth fired face used to be, a different pattern than the cracking you'd see in denser modern brick, which tends to fracture along a line rather than shed its surface layer.
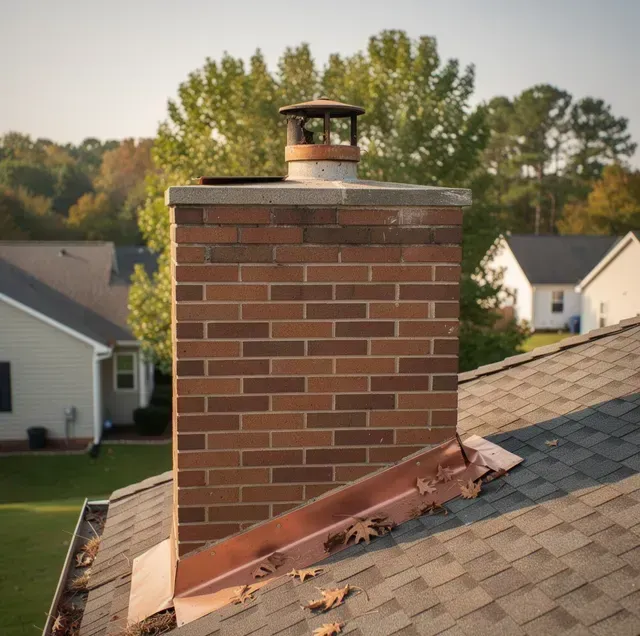
Spalling brick on an older chimney is often a sign of a moisture source, a damaged crown, failed flashing, or a prior repointing job with incompatible mortar, rather than a defect in the brick itself. Replacing spalled units with brick that matches the original size, texture, and porosity matters more on this kind of older masonry than on newer construction, because a mismatched hard brick patched into a soft-brick wall reintroduces the same hierarchy problem as mismatched mortar. In neighborhoods with design-review expectations for exterior changes, matching brick color and profile isn't just a masonry preference; it can also be part of what the local review process expects before a repair is finalized, so it's worth checking with the appropriate local office when brick color or texture is changing noticeably from the original.
Settling and Structural Movement
Older chimneys were often built on shallower footings than current standards call for, and after decades of ground movement and the chimney's own weight, some settling is common: a slight lean, a visible gap where the chimney meets the roofline, or a stair-step crack pattern following the mortar joints diagonally. A small, stable lean or an old, dormant crack isn't automatically an emergency, but telling "old and stable" from "active and worsening" benefits from a hands-on inspection rather than a guess from the ground.
Older Masonry vs. Modern Masonry: What's Different
| Factor | Older/historic masonry | Modern masonry |
|---|---|---|
| Mortar binder | Lime-based, low or no Portland cement | Portland-cement-based, harder curing |
| Mortar flexibility | Softer, some self-healing of hairline cracks | Rigid once cured, cracks stay cracked |
| Brick type | Handmade or soft-mud, lower fire temperature | Extruded, wire-cut, higher fire temperature |
| Brick porosity | More absorbent, prone to spalling | Denser, less water uptake |
| Typical liner status | Often unlined, undersized, or original clay tile | Liner sized and installed to current standards |
| Repair priority | Match mortar chemistry, not just color | Standard modern mortar mixes generally compatible |
| Common failure pattern | Brick face spalling; joint self-healing can mask real deterioration | Joint cracking tends to precede brick damage |
A Quick Field Test for Mortar Type
A technician can often get a first read on mortar type without lab testing. Dragging a metal key or nail across a joint that leaves a visible scratch and a little powder points toward a softer, lime-rich mix, while a joint that resists scratching and holds a sharp edge points toward a harder, Portland-heavy mix. This test doesn't replace a proper inspection or lab analysis of the actual composition, but it's a useful first check before assuming a chimney can be treated like standard modern construction.
Older Masonry Needs a Treatment Formulated for Its Vapor Openness
Lime mortar and soft handmade brick are more vapor-open than modern masonry, part of why the material has survived a century or more without modern damp-proofing. Any exterior treatment applied to that kind of wall has to be matched to that openness rather than a standard formulation built for denser modern brick; a product or application rate that works fine on modern masonry can be too restrictive for a historic wall, which is one more place where "compatible with the original material" matters more than it would on newer construction.
Frequently Asked Questions
How can I tell if my chimney has lime mortar without hiring anyone yet?
Look at the joints on an unpainted section: lime mortar often has a slightly chalky, matte, off-white to gray-tan surface and shows more weathering texture than the flatter, uniform gray of Portland-cement mortar. Soft mortar usually shows visible tool marks or an irregular finish from hand-struck joints, since machine-consistent joints are more of a modern-era hallmark.
Does a chimney with lime mortar need repointing more often than a modern one?
Not necessarily more often, but the intervals can look different, since lime mortar wears gradually and visibly (a slow softening and thinning at the joint face) rather than failing abruptly, so it can look like it needs attention sooner even when the structure is stable. Modern mortar holds its profile until it cracks, which can mask developing water entry until it's further along.
Can lime mortar and modern mortar be mixed in the same repointing job?
Beyond getting the binder right, a good match also depends on the sand: its gradation (the mix of coarse and fine particle sizes) and its color, since sand makes up the bulk of any mortar's volume and largely determines both how the finished joint looks and how it handles moisture movement. A repointing mix can have the right lime-to-Portland ratio and still look wrong, or perform differently than expected, if the sand doesn't match what was originally used.
Is a stair-step crack always a foundation problem?
Not always. A stair-step pattern can result from foundation settling, but it can also come from thermal movement, a roof structure shifting against the chimney over decades, or a rebuilt section of the stack that settled independently from the rest. Distinguishing the cause usually means checking whether the crack is active (fresh debris, a widening gap) or long-dormant.
Does an older chimney's smoke chamber need anything different from a newer one?
Many older chimneys were built with a rough, corbelled smoke chamber (brick stepped inward in ledges rather than smoothly sloped) that was never parged smooth, since parging wasn't yet standard practice. That rough surface collects creosote more readily and can restrict draft, so parging with a refractory material to smooth the transition is a common upgrade even when the rest of the masonry is sound.
If a previous repair used the wrong mortar, does the whole chimney need to be redone?
Usually not. A hardened repair section can typically be identified and evaluated on its own, since the goal is to remove the incompatible mortar from the affected joints and replace it with a matched mix, not rebuild sound original work elsewhere on the stack.
Older masonry rewards a slower, more diagnostic approach than newer construction does. The chimney isn't just aging; it's a different building system than the one most repair products and techniques were designed around, and treating it that way from the first inspection is what keeps a century-old stack standing for another century, instead of trading a slow, self-healing wear pattern for a fast, brittle one.
Schedule an inspection for your older masonry chimney — technicians evaluate original mortar, liner condition, and brick before recommending any repair. Perfect Chimney Cleaning serves Greensboro, High Point, and Winston-Salem. Call (336) 604-6711.
Recent Posts